AOP在Nest中的应用#
1、中间件#
中间件是 Express 里的概念,Nest 的底层默认是 Express,它在请求流程中的位置大致如下:

中间件可以在路由处理程序之前或者之后插入需要执行的任务,Nest做了进一步细分,主要分为全局中间件和局部中间件
我们可以通过命令**nest g mi [中间件名称]**直接来创建中间件,比如nest g mi person就会自动帮我们在person文件夹下创建person.middleware.ts文件
person.middleware.ts
import { Injectable, NestMiddleware } from '@nestjs/common'import { Request, Response, NextFunction } from 'express'
@Injectable()export class PersonMiddleware implements NestMiddleware { use(req: Request, res: Response, next: NextFunction) { console.log('before 中间件 ---' + req.url) next() console.log('after 中间件 ---' + res.statusCode) }}当然,默认生成的参数req,res类型都是any,next就是一个默认函数() => void我们可以加上express对应的相关类型。
我们可以在person模块中调用中间件
person.module.ts
import { MiddlewareConsumer, Module, NestModule } from '@nestjs/common'import { PersonService } from './person.service'import { PersonController } from './person.controller'import { PersonMiddleware } from './person.middleware'
@Module({  controllers: [PersonController],  providers: [PersonService],})export class PersonModule implements NestModule {  configure(consumer: MiddlewareConsumer) {    consumer.apply(PersonMiddleware).forRoutes(PersonController)  }}
当然,我们也可以像下面一样,指定特定的路由:
import {  MiddlewareConsumer,  Module,  NestModule,  RequestMethod,} from '@nestjs/common'import { PersonService } from './person.service'import { PersonController } from './person.controller'import { PersonMiddleware } from './person.middleware'
@Module({  controllers: [PersonController],  providers: [PersonService],})export class PersonModule implements NestModule {  configure(consumer: MiddlewareConsumer) {    consumer.apply(PersonMiddleware).forRoutes({      path: '/person',      method: RequestMethod.GET,    })  }}
当我们访问/person时,后端打印如下效果:
before 中间件 ---/personperson controllerafter 中间件 ---200在Nest中,类中间件不仅可以处理HTTP请求和响应,更重要的是,它能够实现依赖注入。这意味着我们可以在中间件中注入特定的依赖项,并且调用这些依赖项内部的方法。比如:
import { Inject, Injectable, NestMiddleware } from '@nestjs/common'import { Request, Response, NextFunction } from 'express'import { UserService } from 'src/user/user.service'import { PersonService } from './person.service'
@Injectable()export class PersonMiddleware implements NestMiddleware {  @Inject(PersonService)  private personService: PersonService
  use(req: Request, res: Response, next: NextFunction) {    console.log('before 中间件 ---' + req.url)    console.log('调用注入的服务 ---' + this.personService.findAll())    next()    console.log('after 中间件 ---' + res.statusCode)  }}
当然,如果不需要依赖注入的话,也能使用轻量的函数中间件,就和定义普通函数差别不大
export function PersonMiddleware( req: Request, res: Response, next: NextFunction) { console.log('before 函数中间件 ---' + req.url) next() console.log('after 函数中间件 ---' + res.statusCode)}除了在局部引用,也能直接在全局引用,作为全局中间件使用,比如,我创建一个logger中间件,nest g mi logger
import { Injectable, NestMiddleware } from '@nestjs/common'import { Request, Response, NextFunction } from 'express'@Injectable()export class LoggerMiddleware implements NestMiddleware { use(req: Request, res: Response, next: NextFunction) { console.log('before 全局中间件 ---' + req.url) next() console.log('after 全局中间件 ---' + res.statusCode) }}在main.ts中全局引入
import { NestFactory } from '@nestjs/core'import { AppModule } from './app.module'import { LoggerMiddleware } from './logger/logger.middleware'
async function bootstrap() { const app = await NestFactory.create(AppModule) app.use(new LoggerMiddleware().use) await app.listen(8088)}bootstrap()2、守卫#
守卫的职责一般很明确,通常用于权限、角色等授权操作,守卫所在的位置与中间件类似,可以对请求进行拦截和过滤,其实,Guard 就可以理解为路由守卫的意思,可以用于在调用某个 Controller 之前判断权限,返回 true 或者 false 来决定是否放行
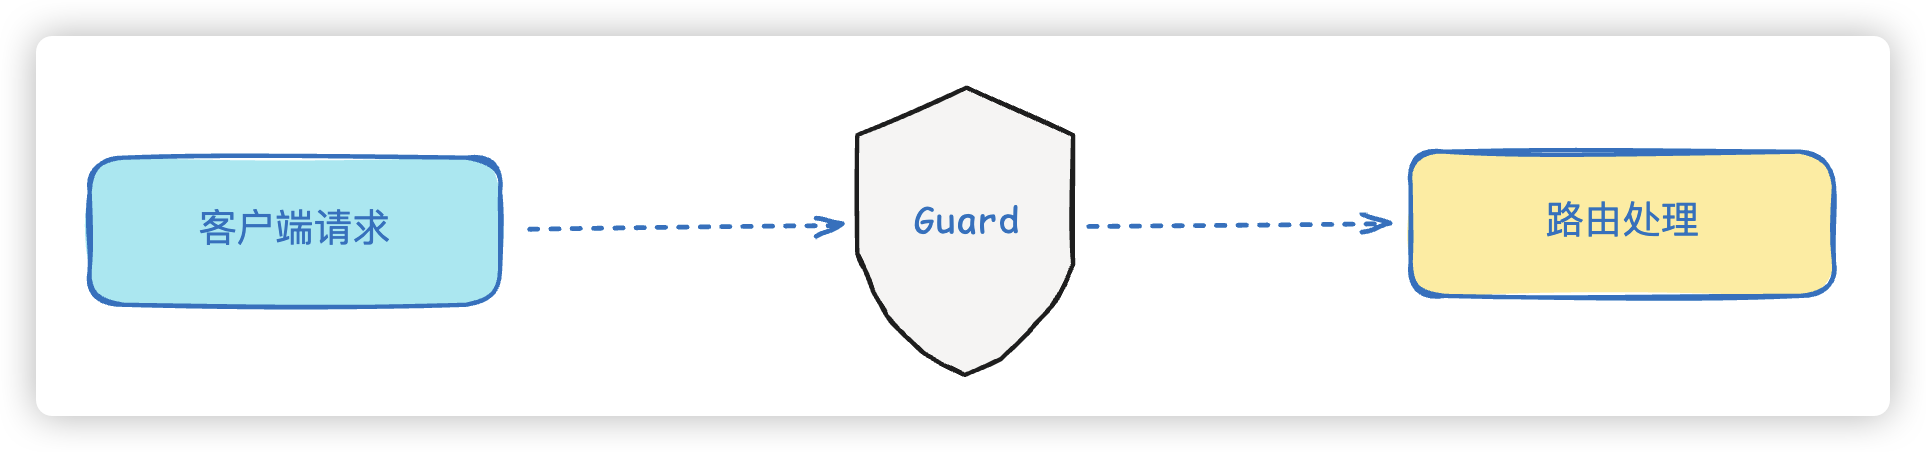
守卫在调用路由程序之前返回true或者false来判断是否通行,同样分为全局守卫和局部守卫
同样,我们可以使用命令**nest g gu [守卫名称]**来创建守卫模块,比如:nest g gu person就会自动帮我们在person文件夹下创建person.guard.ts文件
要作为一个守卫,必须实现CanActive接口中的canActivate()方法
person.guard.ts
import { CanActivate, ExecutionContext, Injectable } from '@nestjs/common'import { Observable } from 'rxjs'
@Injectable()export class PersonGuard implements CanActivate { canActivate( context: ExecutionContext ): boolean | Promise<boolean> | Observable<boolean> { console.log('person guard') return true }}如果我们进行局部绑定,可以直接在Controller类上添加装饰器@UseGuards
@Controller('person')@UseGuards(PersonGuard)export class PersonController {......}这样,当我们访问/person时,打印如下效果:
before 中间件 ---/personperson guardafter 中间件 ---200person controller但是如果在canActivate方法中返回的是false,就会是如下效果
{"message":"Forbidden resource","error":"Forbidden","statusCode":403}Controller 本身不需要做啥修改,却透明的加上了权限判断的逻辑,这就是 AOP 架构的好处
而且,就像 Middleware 支持全局级别和路由级别一样,Guard 也可以全局启用
async function bootstrap() { const app = await NestFactory.create(AppModule); app.use(new LoggerMiddleware().use); app.useGlobalGuards(new PersonGuard()); await app.listen(8088);}bootstrap();这样每个路由都会应用这个 Guard。
但是,注意,这种方式是通过自己new的 Guard 实例,不在 IoC 容器里。这会造成什么问题呢?由于没有在IoC容器中所以,当然无非获取从容器中注入的内容,比如像下面的代码:
@Injectable()export class PersonGuard implements CanActivate {  @Inject(PersonService)  private personService: PersonService
canActivate( context: ExecutionContext ): boolean | Promise<boolean> | Observable<boolean> { console.log('person guard ---' + this.personService.findAll()) return true }}在PersonGuard中引入了PersonService,但是这需要从IoC容器中进行注入,而我们的PersonGuard是自己new出来的,并没有被IoC容器所托管,因此,在这里是用不了PersonService对象的,会在后台直接报错,直接前台提示500错误。
ERROR [ExceptionsHandler] Cannot read properties of undefined (reading 'findAll')
{"statusCode":500,"message":"Internal server error"}所以,Nest还给我们提供了另外一种全局注册方式,在 AppModule 里声明,当然记得把之前new的Guard实例注释掉:
import { APP_GUARD } from '@nestjs/core';import { PersonGuard } from './person/person.guard';
@Module({  imports: [UserModule, PersonModule],  controllers: [AppController, PersonController],  providers: [    AppService,    PersonService,   {      provide: APP_GUARD,      useClass: PersonGuard,    },  ],})export class AppModule {}