Nest中的装饰器#
TS中的常见的装饰器类型有5种,包括类装饰器。方法装饰器、属性装饰器、参数装饰器和访问器装饰器。
在Nest中实现了前4种装饰器:
- 类装饰器:@Controller、@Injectable、@Module、@UseInterceptors
- 方法装饰器:@Get、@Post、@Patch、@Delete、@UseInterceptors
- 属性装饰器:@IsNotEmpty、@IsString、@IsNumber
- 参数装饰器:@Body、@Param、@Query
当然,常用的装饰器远远不只我列举的这些,这里只是简单给大家提及一下最常用的,其他的一些大家可以慢慢认识
- @Controller():用于装饰控制器类,使之能够管理应用中的路由程序,并通过设置路由路径前缀来模块化管理路由
- @Injectable():装饰后成为服务提供者(provider),可以被其他对象进行依赖注入
- @Module():模块装饰器,用于在Nest中划分功能模块并限制依赖注入的范围
- @UseInterceptors():用于绑定拦截器,也可以作用在类方法上,AOP相关的装饰器都与之类似,比如@UseFilters()、@UsePipes()等等
- @Global():声明全局模块
- @Get、@Post、@Put、@Delete、@Patch、@Options、@Head:声明 get、post、put、delete、patch、options、head 的请求方式
上面的这些装饰器,我们之前用过一些,有一些我们后面课程会慢慢解释,这里先把我们可能常用到一些参数装饰器集中解释一下,对于前端来说,后端主要是提供 http 接口来传输数据,而这种数据传输的方式主要有 5 种:
- url param:可以把参数写在 url 中,比如:
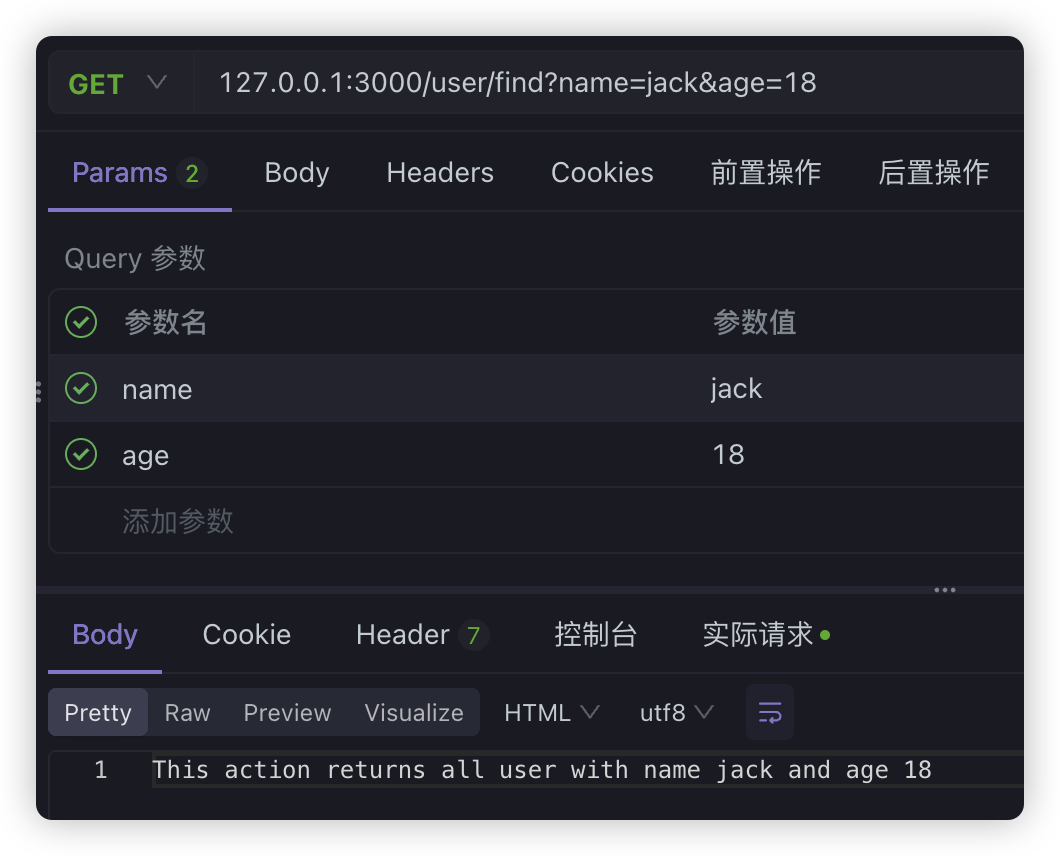
http://127.0.0.1:3000/person/123 - query:通过 url 中
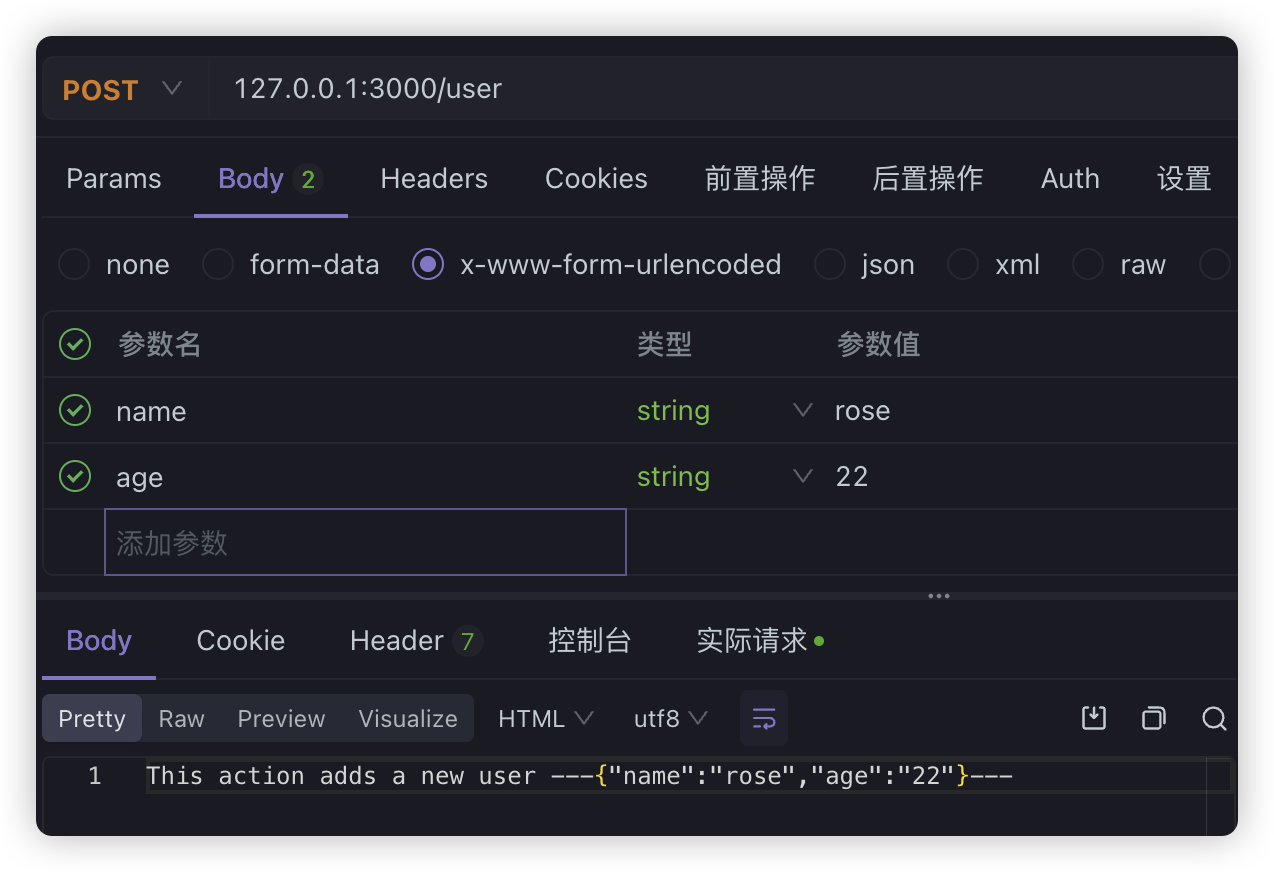
?后面的用&分隔的字符串传递数据。比如:http://127.0.0.1:3000/person?name=jack&age=19 - form-urlencoded:直接用form表单提交数据的方式,
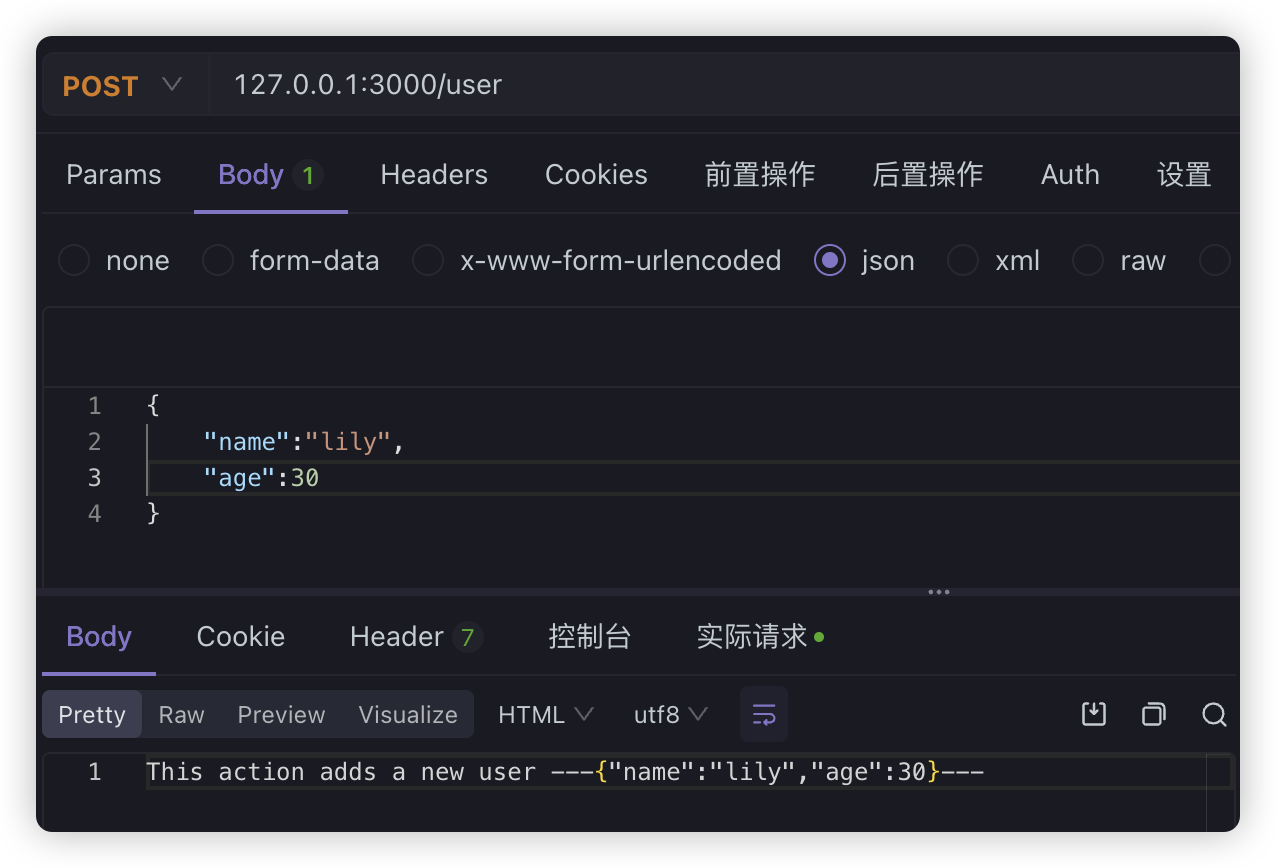
content-type是application/x-www-form-urlencoded,数据放在请求体中 - json:传输 json 数据,
content type为application/json - form-data:传输文件的方式,需要指定
content type为multipart/form-data,然后指定boundary分割线
对于url param和query其实就是GET方式的请求,只是url处理不一样
@Controller('user')export class UserController {  constructor(private readonly userService: UserService) {}
  @Get('find')  query(@Query('name') name: string, @Query('age') age: number) {    return this.userService.query(name, age)  }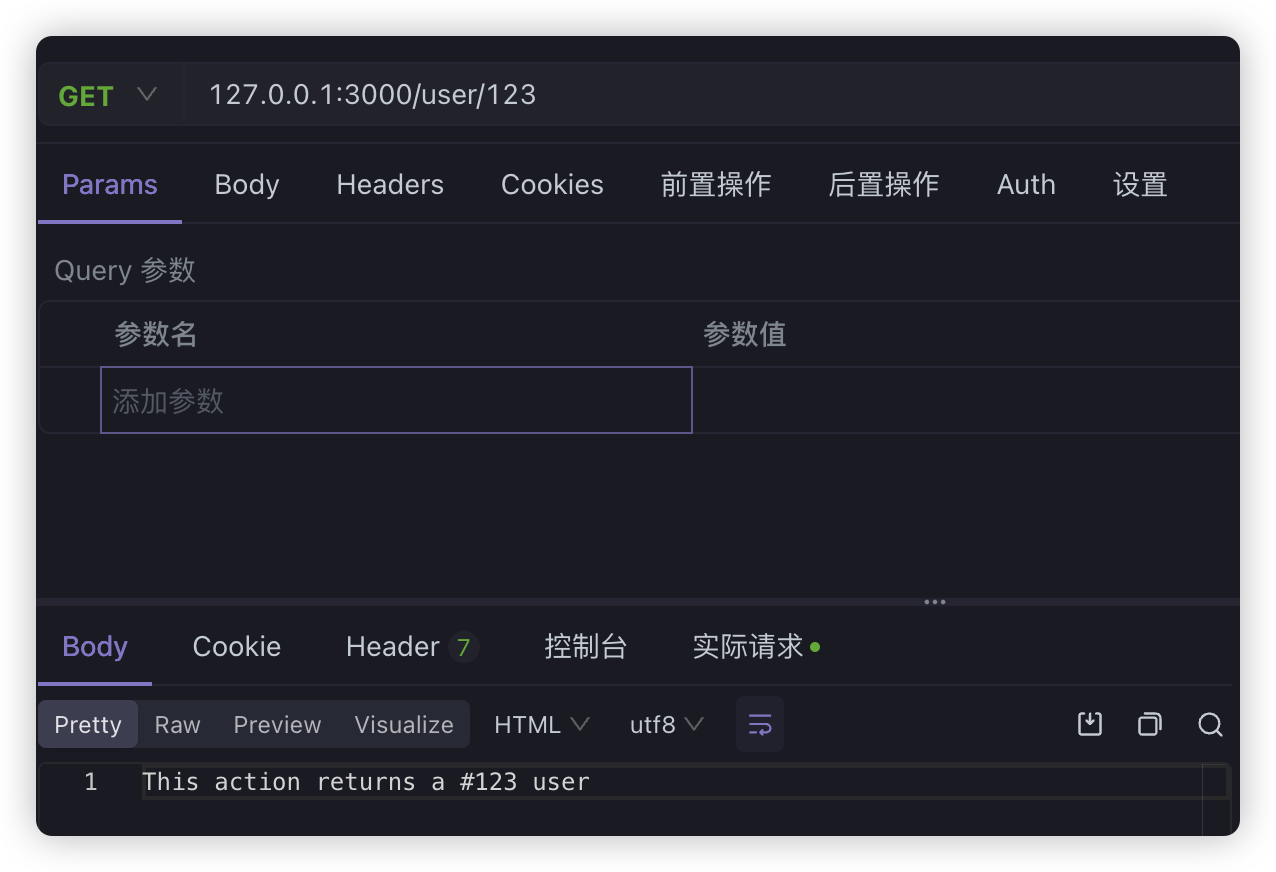
@Get(':id') findOne(@Param('id') id: string) { return this.userService.findOne(+id) }}这里要注意:
find的路由要放到的路由前面,Nest 是从上往下匹配的,如果放在后面,就会先匹配到 :id路由
url param
query
form-urlencoded
首先来看请求的样式:
用 Nest 接收的话,使用 @Body 装饰器,Nest 会解析请求体,然后注入到 dto 中
dto 就是 data transfer object,就是用于封装传输的数据的对象,我们之前在讲解三层架构的时候专门提到过
create-user.dto.ts
export class CreateUserDto { name: string age: number}user.controller.ts
@Controller('user')export class UserController {  constructor(private readonly userService: UserService) {}
  @Post()  create(@Body() createUserDto: CreateUserDto) {    return this.userService.create(createUserDto)  }}
由于使用了三层架构,service中稍微做一下处理
@Injectable()export class UserService { create(createUserDto: CreateUserDto) { return ( 'This action adds a new user ---' + JSON.stringify(createUserDto) + '---' ) }}JSON
JSON方式无非就是前端传输的时候,选择的content-typ 为 application/json,内容会以 JSON 的方式传输。后端代码同样使用@Body 来接收,在Nest中的处理和form-urlencoded是一样的
form-data的方式由于还需要用到其他的一些内容,我们后面通过例子一并讲解,除了这些常用的参数装饰器之外,还有其他的参数装饰器,比如,如果我们想拿到IP地址,拿到请求头信息这些内容,就可以直接通过参数装饰器获取
@Get('other')other( @Ip() ip: string, @Headers() headers: Record<string, any>, @Req() request: Request,) { console.log(ip); console.log(headers); console.log(request.url); return 'other';}上面通过@Ip()、@Headers()装饰器就获取IP地址和头信息,通过@Req()直接获取request请求对象。在Nest中@Req和@Request是一致的
既然能获取请求对象,那么响应对象Response也能获取,可以通过注解@Res或者@Response,不过注意一点,如果手动加入了响应对象,那么就必须自己通过响应对象处理返回信息,比如,上面的方法如果我们手动加上了@Res,直接请求就会出现问题
@Get('other')other( @Ip() ip: string, @Headers() headers: Record<string, any>, @Req() request: Request, @Res() response: Response,) { console.log(ip); console.log(headers); console.log(request.url); return 'other';}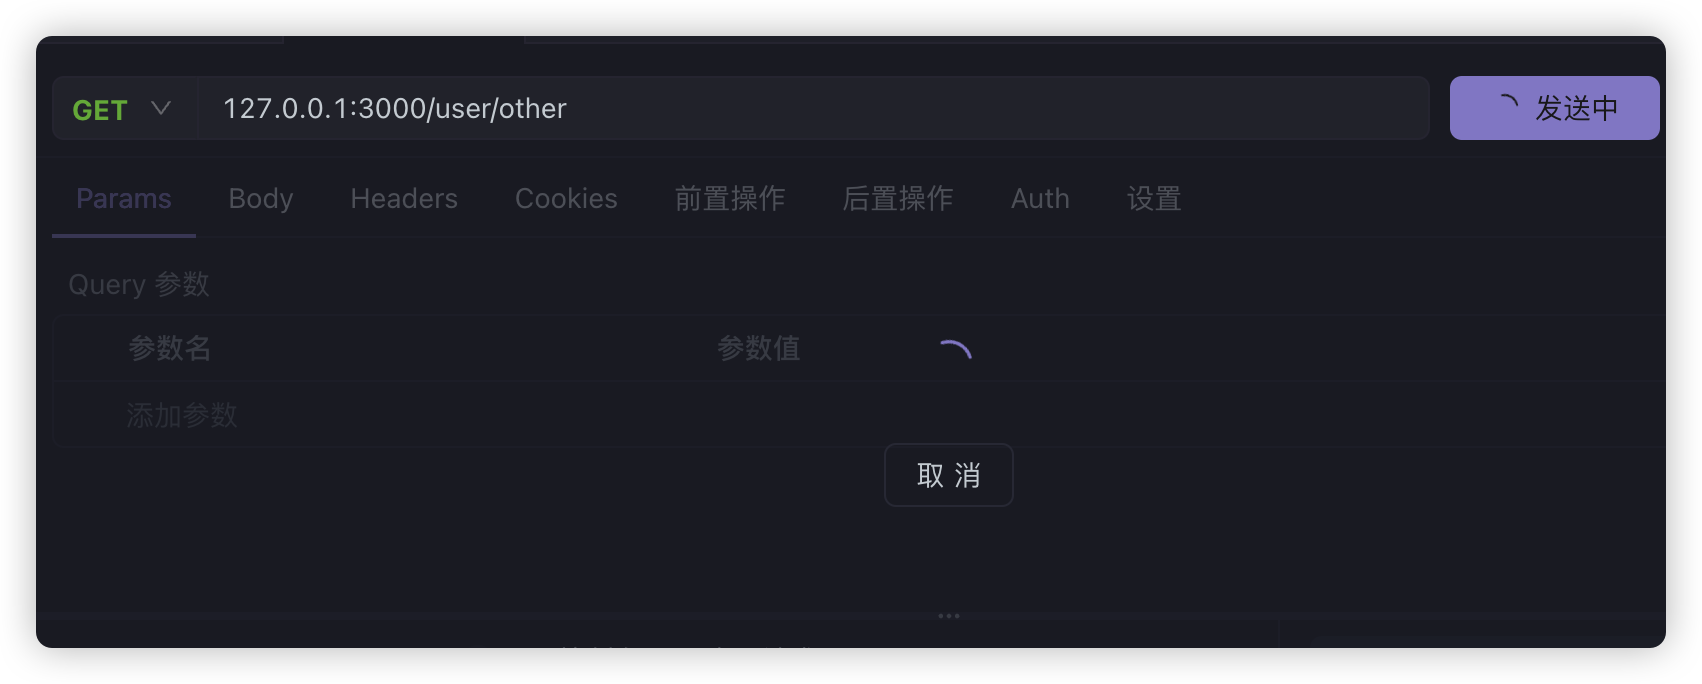
这里handler就不会通过返回的字符串帮我们进行响应了,需要我们自己手动处理。
@Get('other')other( @Ip() ip: string, @Headers() headers: Record<string, any>, @Req() request: Request, @Res() response: Response,) { console.log(ip); console.log(headers); console.log(request.url); response.end('other');}注意:
这里的
Request、Response对象,需要从express中导入,才能方便的使用相关方法
import { Request, Response } from 'express';