环境信息:Node.js 20.x、@nestjs/cli 10.x、TypeScript 5.x
Nest CLI的安装与命令#
执行一下命令即可将Nest CLI安装为全局工具
npm i -g @nestjs/cli安装完成之后,执行nest -h命令,结果如图:
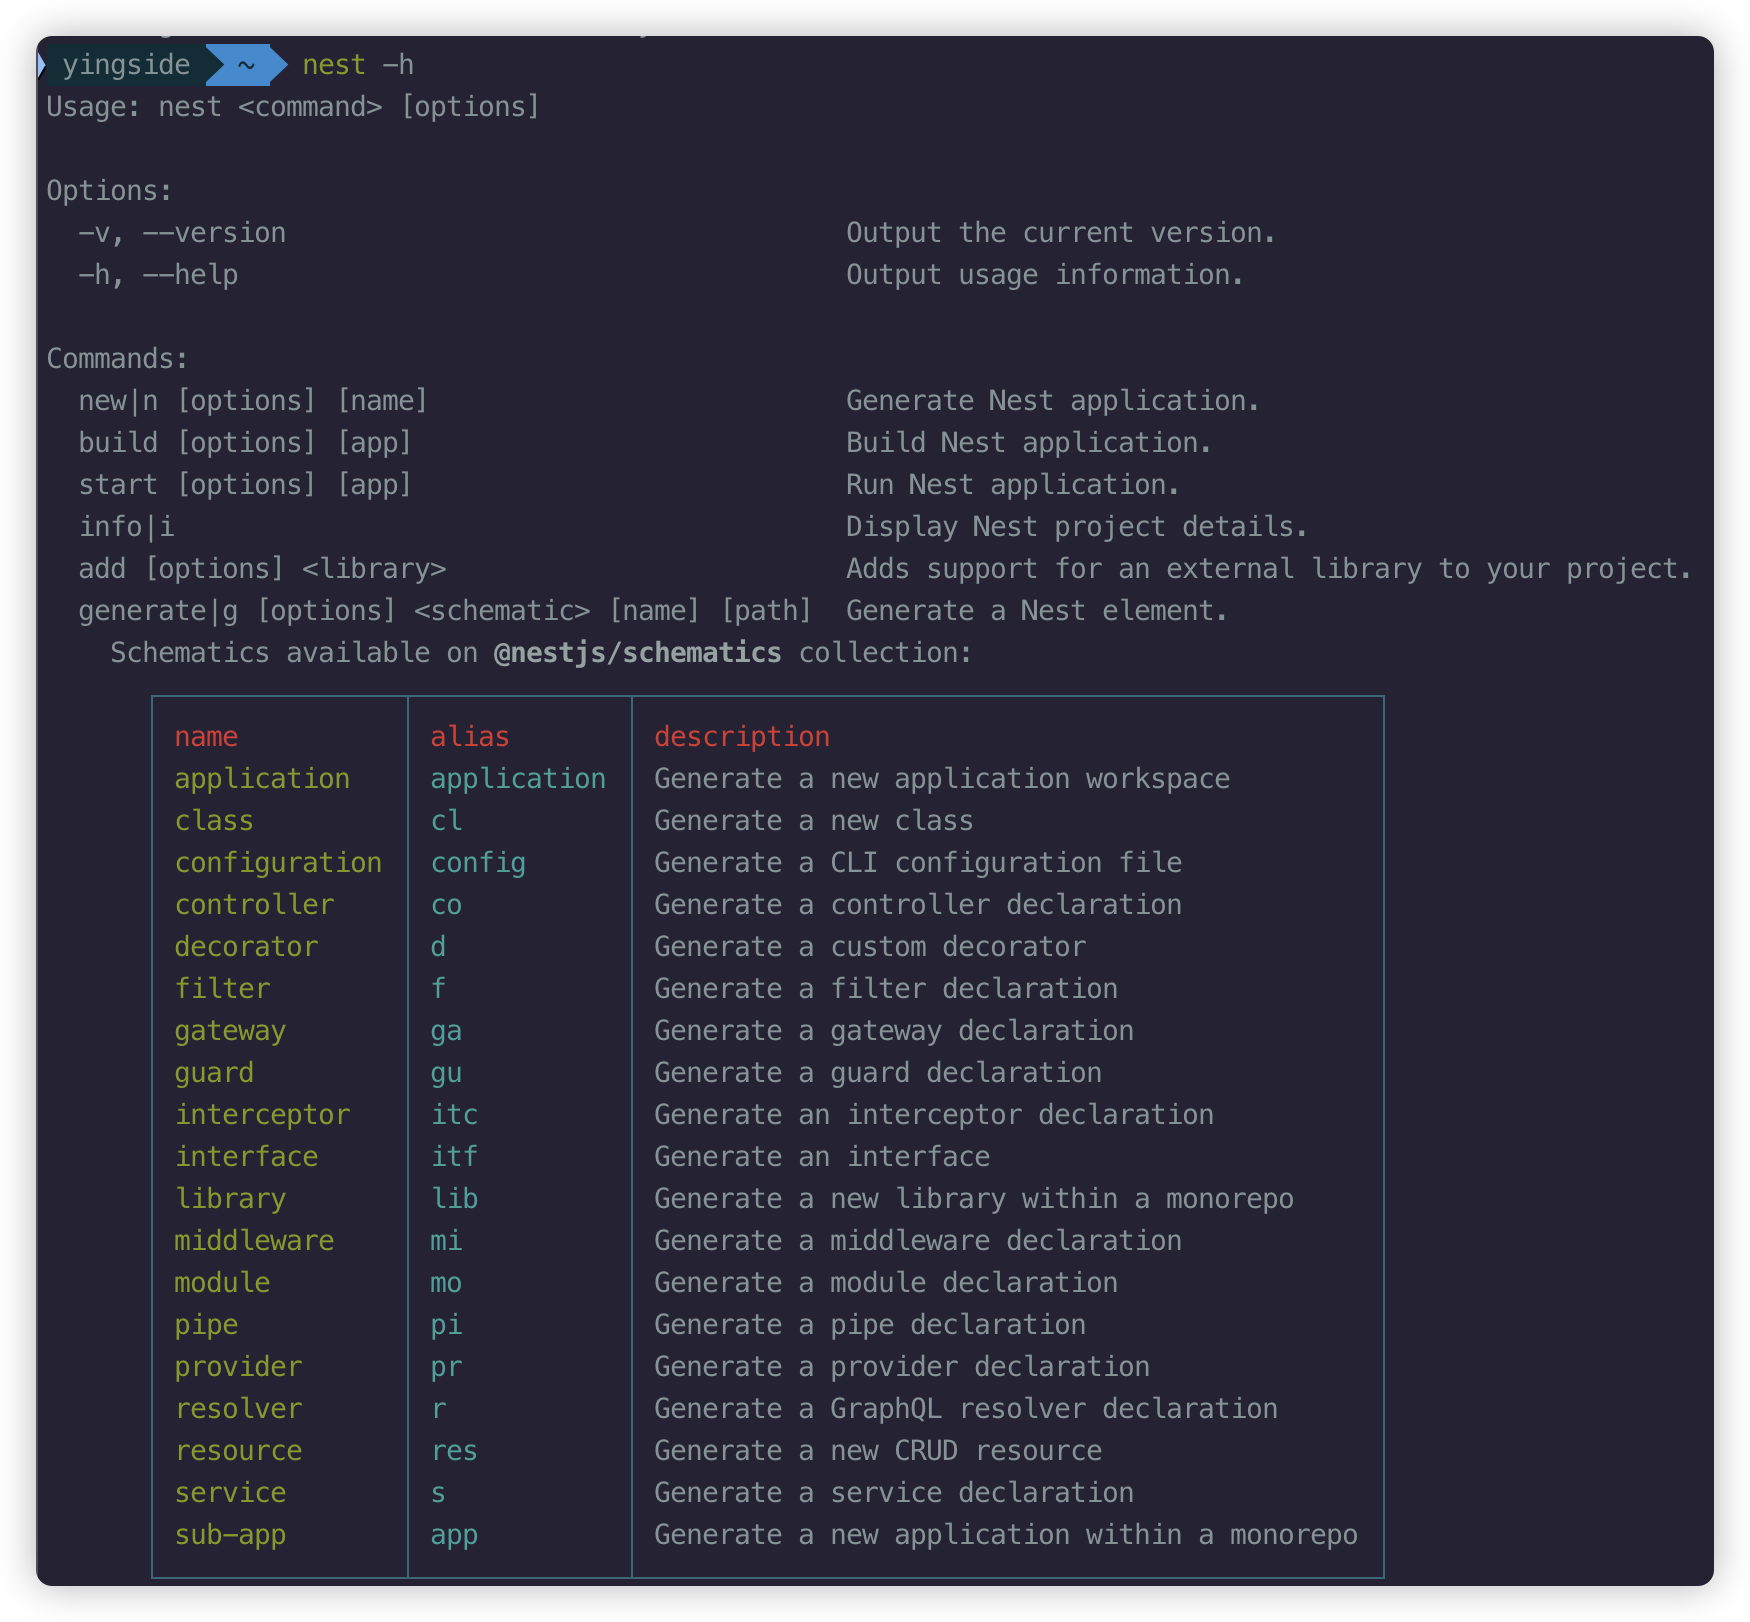
Nest提供了非常丰富的命令:
- nest new:用于创建项目
- nest build:用于构建生成环境代码
- nest start:用于启动本地开发服务
- nest info:用于查看当前项目中的Nest包信息
- nest add:用于添加官方插件或者第三方模块
- nest generate:用于生成各种模块代码,比如Module、Controller、Service、Pipe、Middleware等
同时,命令也支持别名,比如nest n、nest i、nest g
创建项目#
创建项目可以直接使用 nest new 命令,当然我们也可以通过-h查看相关参数
nest new -h
--skip-git和--skip-install:用于跳过Git初始化和npm包安装步骤--package-manager:指定使用的包管理器(npm/yarn/pnpm)--language:使用TS还是JS进行编写代码,默认使用TS--collection:用于指定工作流集合,默认是@nestjs/schematics,用于创建模块,控制器,服务等等,与nest generate命令相关。通常默认值即可。--strict:用于指定TS是否以严格模式运行
直接执行nest n [工程名]即可帮你创建项目,不过会提示你使用什么包管理器

当然,也可以加上参数

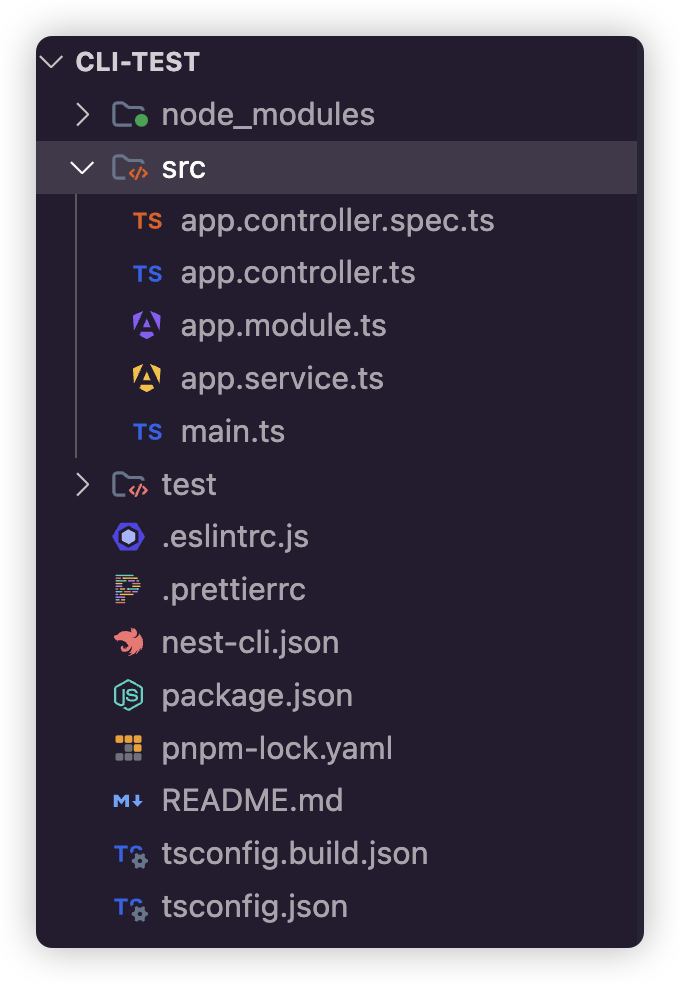
CLI直接创建的项目模板:
我们也可以使用nest generate单独创建项目需要的内容,比如模块,控制器,服务等等
生成指定的代码片段#
执行nest generate -h命令,可以查看相关内容

你可以通过下面的命令,逐个生成Controller、Service或者Module
nest g controller 控制器名称
nest g service 服务名称
nest g module 模块名称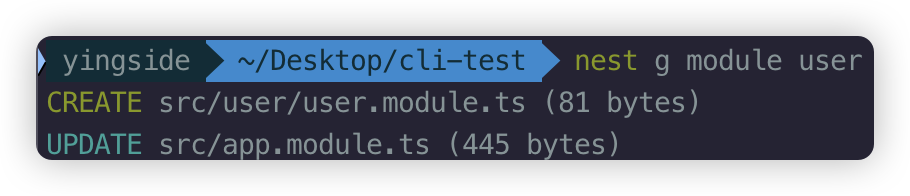
其实,module,service和controller是有关系,只是这其中的关系我们后面再慢慢解释,这涉及到后端架构方面的处理,反正无论如何这几个我们都要创建,那一个个去处理太麻烦,所以我们可以直接使用nest generate resource命令一键生成后端需要的CRUD模板代码
nest g resource person注意需要选择REST风格的API


其中dto和entity是CRUD相关需要的代码,我们这里暂时不需要理会他们,后面我们会慢慢讲解
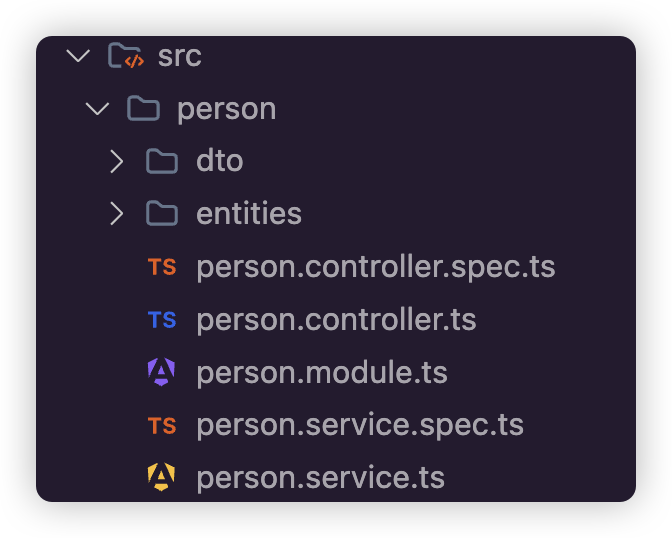
.spec.ts是单元测试文件,我们可以在创建的时候,通过参数--no-spec参数表明不生成测试文件,比如:
nest g resource order --no-spec
一些格式报错问题#
工程创建好之后,有些代码会报错。


其实这并不是错误,而是eslint与prettier配置的问题,如果你不想这些红色波浪线错误困扰你,可以直接配置.eslintrc.js屏蔽掉这些错误:
module.exports = { // ...... rules: { '@typescript-eslint/interface-name-prefix': 'off', '@typescript-eslint/explicit-function-return-type': 'off', '@typescript-eslint/explicit-module-boundary-types': 'off', '@typescript-eslint/no-explicit-any': 'off', 'no-unused-vars': 'off', '@typescript-eslint/no-unused-vars': 'off', 'prettier/prettier': [ 'warn', { endOfLine: 'auto', }, ], },}构建应用#
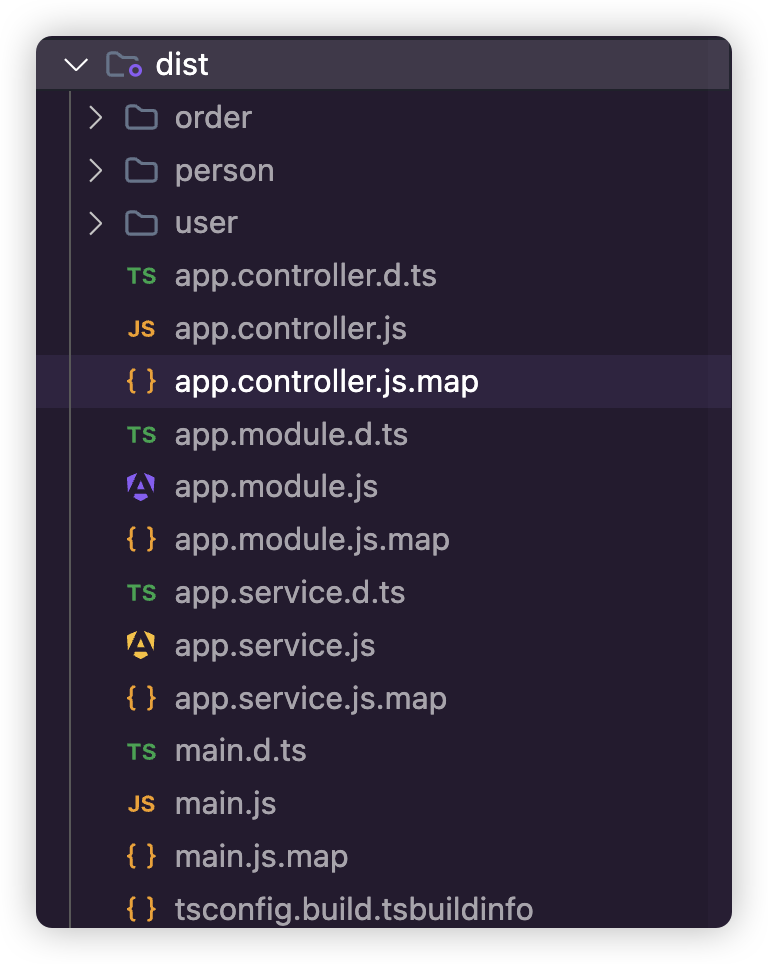
可以通过nest build命令来构建应用
默认情况下,Nest使用tsc进行编译,直接运行nest build命令相关如下:
如果我们希望编译并打包,可以直接切换使用webpack进行打包,只需要使用参数 -b webpack
当然,相关的参数,一样可以使用nest build -h来进行查看
nest build -b webpack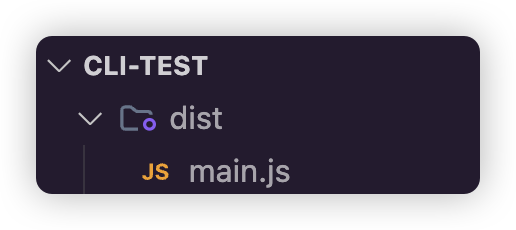
nest-cli.json#
每次执行都需要加上一些参数,这样太麻烦了,nest给我们提供了nest-cli.json配置文件,我们可以在这个配置文件中,直接配置上我们经常需要使用的参数,比如:
{ "$schema": "https://json.schemastore.org/nest-cli", "collection": "@nestjs/schematics", "sourceRoot": "src", "generateOptions": { "spec": false, // 是否生成测试文件 "flat": false // 是否扁平化直接生成文件在src目录下(默认为true,会生成对应的目录结构) }, "compilerOptions": { "deleteOutDir": true, // 是否删除输出目录 "webpack": true // 是否使用webpack }}简单测试#
在main.ts文件中修改端口号,比如为8088
import { NestFactory } from '@nestjs/core'import { AppModule } from './app.module'
async function bootstrap() { const app = await NestFactory.create(AppModule) await app.listen(8088)}bootstrap()为了返回数据方便,先定义一个实体类,比如admin.entity.ts
export class Admin { constructor( private id: string, private name: string, private password: string ) { this.id = id this.name = name this.password = password }}controller中处理
import { Controller, Get, Param } from '@nestjs/common'import { AppService } from './app.service'import { Admin } from './admin.entity'
@Controller()export class AppController {  constructor(private readonly appService: AppService) {}
  @Get()  getAll(): Admin[] {    return this.appService.getAll()  }
  @Get(':id')  getOne(@Param('id') id: string): Admin {    return this.appService.getOne(id)  }}
service中处理
import { Injectable } from '@nestjs/common'import { Admin } from './admin.entity'
@Injectable()export class AppService {  getAll(): Admin[] {    return [      new Admin('1', 'John Doe', 'password'),      new Admin('2', 'Jane Doe', 'password'),      new Admin('3', 'Jim Doe', 'password'),    ]  }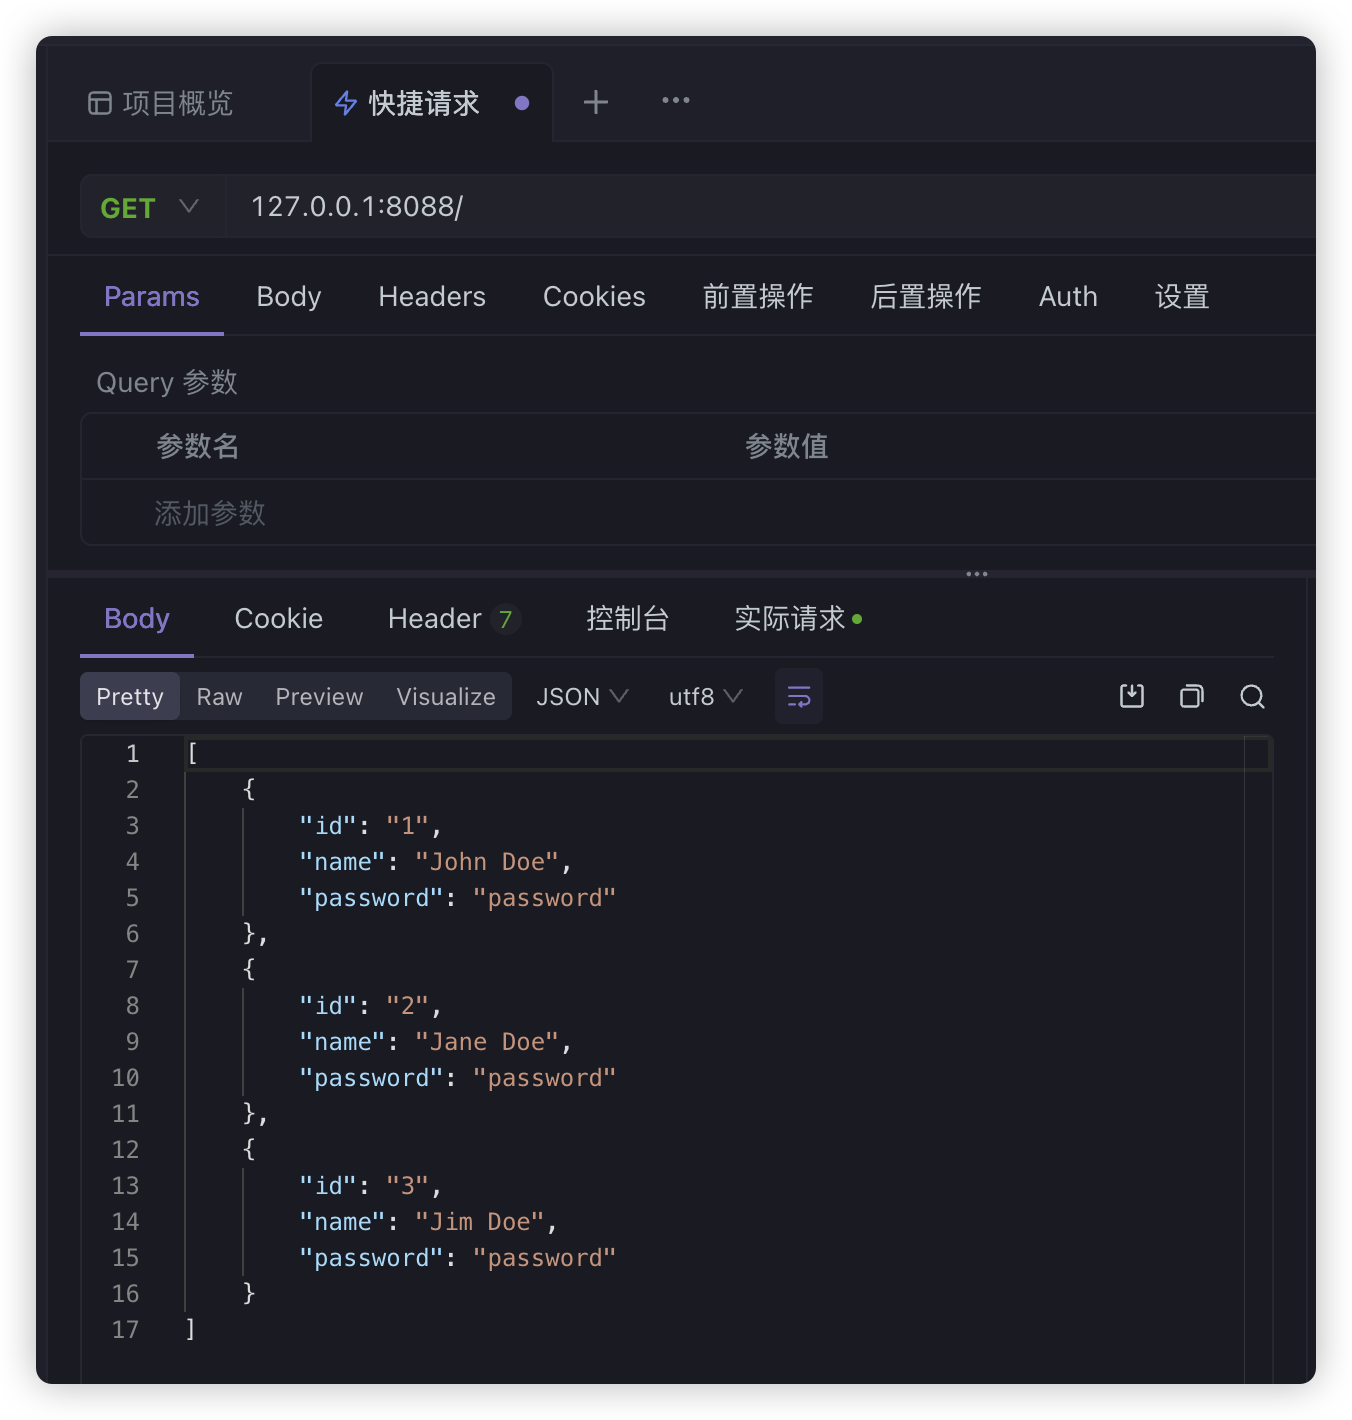
getOne(id: string): Admin { return new Admin('1', 'John Doe', 'password') }}通过命令nest start -w启动后端服务
我们可以直接使用Apifox,或者postman直接测试端口